
When you first are getting started using Revit, the fact that you can draw a line through your stairs and automatically create a section is pretty exciting. It’s easy to look at the 3D modeling and drawing documentation powers of Revit and forget there’s a whole other level of functionality in the software. Simply put, your model is also a database. It took me several years to understand this, and another few to really start to dig into the ways to utilize that database. When we focus on Revit as a drafting tool and 3D Modeler that’s the Building and Modeling of BIM respectively. What about the I, the Information?
Schedules are the starting point for leveraging the information embedded in Revit. This tutorial is meant to get you started down the path of getting more out of your models. I am going to give you the intermediate overview with the assumption you come into this tutorial understanding how to set up basic schedules in Revit with doors and walls and to calculate totals. We are going to work here to take you to the next step, to start to customize schedules with a couple less obvious features. If you find yourself stuck after going through this tutorial let me know. If it causes you to have even more advanced questions about Schedules, that’s great, send those questions my way and we’ll go over them in a future post.
1. Formulas and Calculated Values
Revit’s schedules are like a lite version of Xcel, and as such they have the capability of creating custom formulas you can use in creating new values. Really important thing to note that can cause a lot of frustration: to calculate a value it needs to have the same unit. For example if you want to do cost per square foot calculations, you need to first convert the unit down to a basic integer. The way to do this is to create a new Calculated Value that is Area/1 SF. This will result in a new category where 200 sf becomes 200. Now you can multiply that by a custom cost parameter (we’ll talk about how to set that up next). There are a number of formulas you can create to get more complicated with your schedules. I’m not going to cover them here, but if people let me know requests, I am happy to demonstrate specific case studies of those more advanced formulas in a later post. The four to focus on for now are:
Addition +
Subtraction –
Multiplication *
Division /
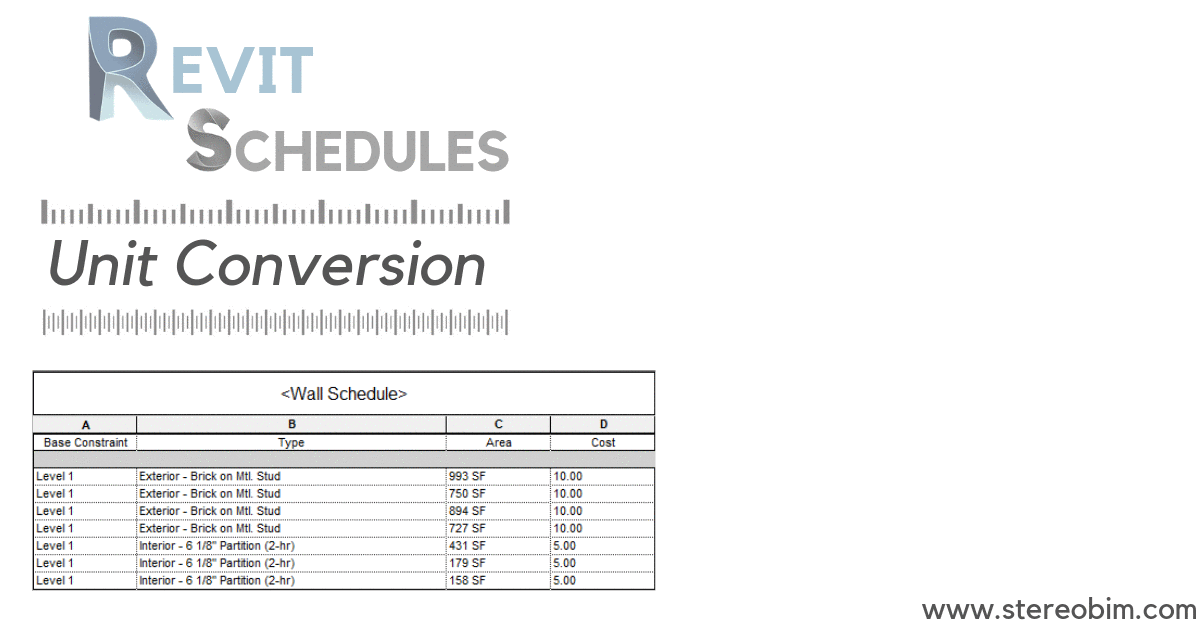
You can go pretty far with just these formulas, getting data on cost, areas, materials and other information that is already embedded in the project.
2. Project and Shared Parameters
We just talked about how to extract information from the model, but what if you want to add even more data? The way to do this is with Project and Shared Parameters. If you are an intermediate user, you are going to want to avoid Shared Parameters. These are stored on your firm’s server as a text file and should be edited only by the company BIM Manager. The value of Shared Parameters is you can use them across projects, so the office can have a uniform standard. If you feel like the parameter you want to implement would be beneficial on all your firm’s projects, definitely discuss with your BIM manager. However if it’s something you are going to be modifying, it’s probably going to be a Project Parameter, which means it doesn’t transfer out to other projects. What does this all mean? Let’s say you want to schedule all the doors in your project and want a cost per door assigned to each different Family Type. The best way to do that would be to create a new Project Parameter called “Cost Per Unit” that is a Number parameter. Now you can embed more data into that door family, so that when you place a door in the wall it is also placing that cost in the database. As an intermediate user, I would suggest you stick primarily to creating three kinds of parameters for now: Text, Integer and Number.
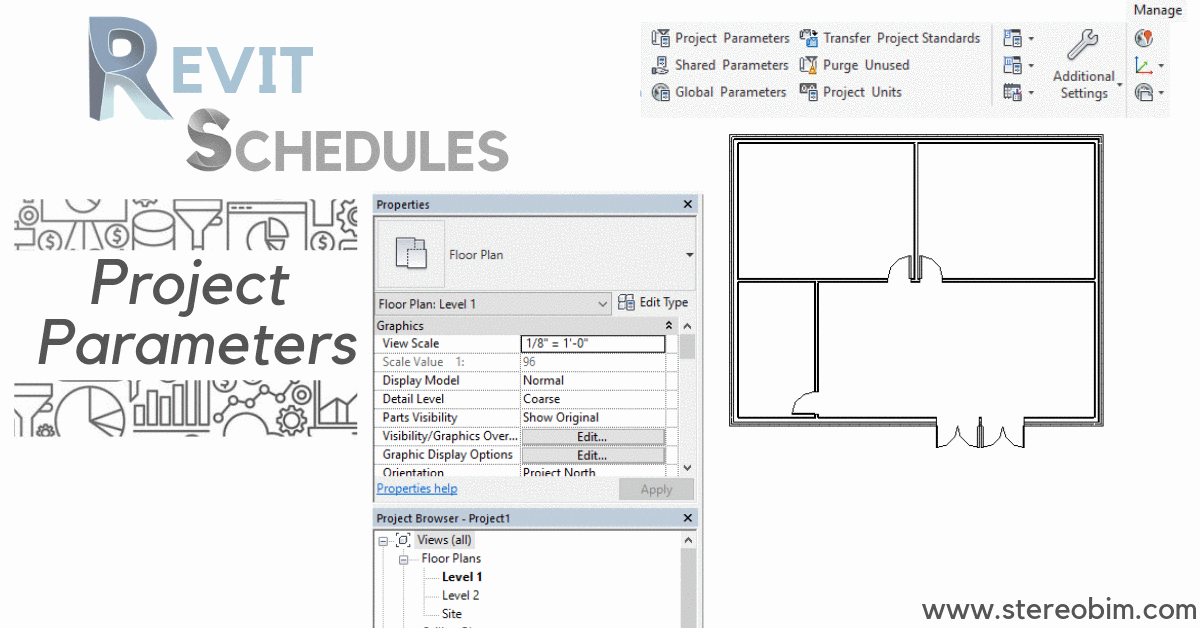
Full Disclaimer: Doors in Revit already have a cost parameter associated with them. I’m just using it as an example, but the same logic could be applied to any parameter that is not already in Revit. Perhaps some of the doors have digital security locks on them, with different specifications. That would be an opportunity to embed data in schedules using Project Parameters.
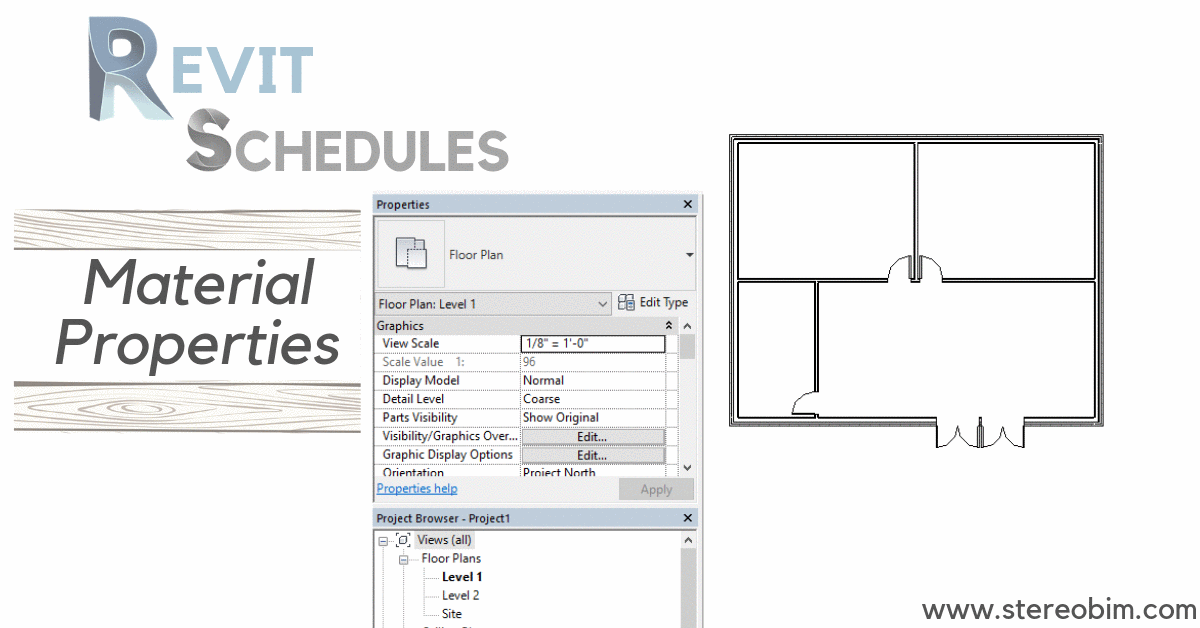
3. Embedding Material Information in your Model
The first two tips primarily focused on data that is not physically modeled but is associated with different elements, like the cost per door example. If you are an intermediate Revit user you are probably familiar with Material Takeoffs. To take full advantage of Material Takeoffs, you need to invest time into accurately defining the materials in your physical model. This means making your walls, roofs and floors reflect their true material composition and modeling them with actual thicknesses for all materials. It’s pretty straightforward and is something you should think about at the beginning of a project.
Probably more than anything else, the thickness of your walls are going to have a significant effect on the model. If you have interior walls modeled at 3” but then realize the stud is actually 2 1/2” plus 5/8” gypsum on both sides suddenly you are looking at all your walls expanding, which will effect dimensions and area calculations. Things change over the course of a project and there is no way to plan for everything, but at least thinking about this and properly setting your wall thickness from the beginning is a good safeguard against novice Revit users modeling the wrong sized walls. It will definitely save you time one way or another in the long run.
Once you have the walls modeled, go in and start looking around at things like doors and windows. These are not as crucial to do right away, as they are likely already modeled to your desired thickness, but being consistent about the material data in these elements will help with getting the most out of your model. A great example would be if you are using different kinds of glass on your project. Most window Family Types come out of the box with “Glass” as their designated Glass Pane Material. If the windows on the south of your building are Low-E Glazing while the ones on the north are a more typical but specific glazing, you will want to go into the Material Browser and create these specific materials, then create different types of your window families and update the materials accordingly. In this way, when you start to parse out all the data in your model, the materials will accurately reflect what is physically modeled in the project.
Bonus Tip: If you have your roof drainage modeled, make sure to click “Variable” next to whatever material – likely insulation – is going to have a varied dimension in the model. This will ensure that any volume calculations are accurate.
That’s a basic overview of scheduling in Revit. Depending on the project size and type, there are a lot of different directions you can go with scheduling. Hopefully this gives you some ideas about how to customize the information for your own project. Do you have a specific scenario you’d like me to discuss more in-depth? Let me know and I will try to put together a post on it.